Oatmeal Cream Pies {Recipe}

Oatmeal Cream Pies | Lil Miss Cakes
I have an obsession with snack cakes.  When I was little I used to tag along with my mom to the supermarket because I knew she would let me pick out a treat.  I was not a kid who liked candy; I always went for the cake.  During high school and college I tried to stay away from junk food–all of a sudden boys were important and so was my waistline.  Years later, pregnant and starving, I craved those nostalgic snack cakes, but they weren’t as delicious as I remembered.  Now I am on a quest to create all my favorite cakes and cookies, starting with these.

Soft and chewy oatmeal cookies filled with marshmallow cream.  The first time I made these I must have eaten the whole batch.  Okay that might not be entirely true, I shared.  But I didn’t want to.  The next time I made these, I doubled the recipe.  Here’s how it all comes together.  Brown sugar, margarine and eggs go into the mixer. Then add the corn syrup and vanilla extract. Finally add in the dry ingredients: flour, oats, baking powder, baking soda, cinnamon and salt.

When it all comes together, scoop it out onto parchment lined baking pans.  I like parchment paper because then the cookies don’t stick to the pan and there is no cleanup!

I know you are tempted, but try not to eat them until they are sandwiched with cream.  They are not so sweet on their own.   The cream adds the sweetness needed and balances out the flavor.  I know this because I ate one, or two…  Then line them up on a cooling rack.

Next step is to mix up the marshmallow filling.  In a stand mixer whip up shortening, confectioners sugar and vanilla.  Add in some water until it is light and spreadable.  Then add in the marshmallow cream.

Once the cream is all mixed up, it’s time to fill the cookies!  You can use the same cookie scoop or spoon to fill the cookies but I like to use a pastry bag fitted with a plain tip.

I pipe the cream on half of the cookies. Then sandwiched them together.  That’s the fun part

Want the recipe?  It’s non-dairy!

Oatmeal Cream Pies
Serves: About 2 Dozen
 
Ingredients
Cookie
  • ¾ cup margarine (1½ sticks)
  • 2 cups brown sugar
  • 2 eggs
  • 2 Tbs. light corn syrup
  • 2 tsp. vanilla extract
  • ½ tsp. salt
  • 2 cups flour
  • 1 tsp. baking powder
  • 1 tsp. cinnamon
  • 2 cups rolled oats
  • 2 tsp. baking soda
  • 3 Tbs. boiling water
Marshmallow Cream Filling
  • 1 cup shortening
  • 2 cups confectioners sugar
  • 1 tsp. vanilla extract
  • cold water
  • 1 cup marshmallow fluff
Instructions
For the Cookie
  1. Heat oven to 350°F.
  2. In the bowl of an electric stand mixer fitted with the paddle attachment, beat the margarine and brown sugar until combined.
  3. Add in the eggs, corn syrup and vanilla. Mix until combined.
  4. Add in the salt, flour, baking powder, cinnamon and oats and mix until combined.
  5. Finally, mix the baking soda with the hot water and add it to the batter.
  6. Using a cookie scoop or spoon, drop the dough onto a parchment lined cookie sheet. Allow space between the cookies because they will spread.
  7. Bake at 350°F for 8-10 minutes until very lightly browned.
  8. Allow the cookies to cool before filling and sandwiching them together.
For the Marshmallow Cream Filling
  1. In the bowl of an electric mixer fitted with the paddle attachment, beat the shortening with the sugar and vanilla until light and fluffy.
  2. Slowly add in cold water until smooth and creamy.
  3. Add in the marshmallow fluff and mix on low speed until combined. Do not mix too much or the cream will separate.
  4. To fill the cookies with cream I like to use a pastry bag fitted with a plain tip to pipe the cream on one side. A cookie scoop or spoon can be used to scoop cream into the cookies, or spread the cream with a knife.
  5. Sandwich together and enjoy!


Get Inspired!

A while back my mother asked me to make a cake for one of her coworkers named Dalia.  It was her birthday and my mom thought she would love a custom cake as a gift.  My mom didn’t have any specific design in mind, she let me do my thing.  I had been dying to make a zebra print cake and this was my first chance!  This is what I came up with.

Dalia's Zebra Print Cake

The inside was rich chocolate cake with sweet raspberry cream. YUM.  What do you think of the design?  The black and white zebra print contrast so well, but the pink accents really make this cake pop.  I airbrushed a little shimmer color to really make it special.  Dalia was thrilled with her gift!  She loved it and was nice enough to share it with her friends at work.  A few days ago my mother called me from work.  She told me her friend Stacy was inspired by my cake and used my design to create some goody bags for her granddaughters party.  They came out great!

Zebra Print Goody Bags

She is so talented.  I can’t believe she had my cake design in her head all this time!  It feels great knowing I inspired someone’s creativity!  Where do you get your creative inspiration from?

“Like” this Facebook Cake!

When my cousin, Hailey, asked me to make her Bat Mitzvah cake, I was excited.  When I heard her party theme was Facebook, I was thrilled!! I love themes!!!  Her theme was actually “Kayebook” a take on her last name: Kaye.

Facebook Cake!

This cake was so much fun to make.  For the bottom tier, I used four 6″ cakes instead of one large layer.  I like the look this gave the cake.  After covering each of the four 6″ cakes in fondant, I striped each cake in blue painters tape.  Then I painted clear gel paste onto the fondant.  Each cake was covered in crystal sugar but it only stuck to the gel.  When the painters tape was removed, it left this great white on white sparkly design.

Here is a closeup of the “Kayebook” tier.  I think I did a pretty good job matching the color scheme of Facebook.

Closeup

This tier is a 10″ round cake and about 4″ tall.  After covering it in white fondant, I used my trusty airbrush to achieve the perfect Facebook blue.  I mixed blue with a touch of purple to get this rich blue tone.  The key to airbrushing fondant a dark color is to airbrush in coats.  Don’t keep airbrushing and airbrushing…trust me, I’ve done it.  The color is just too wet and starts to run off the fondant.  Just apply a thin coat and allow it to dry to the touch.  Then repeat until you have a nice even finish.

The lettering is cut out of gumpaste.  I printed the letters out on a regular ol’ laser printer and cut them out with some scissors.  I then rolled out some white gumpaste and stuck it to a cutting mat with shortening.  Then I traced the letters out with a sharp knife-xacto knife to be exact.  I used royal icing to “glue” them to the cake.  I feel like I am talking too much, want more pics?

Hailey with her dad and bro

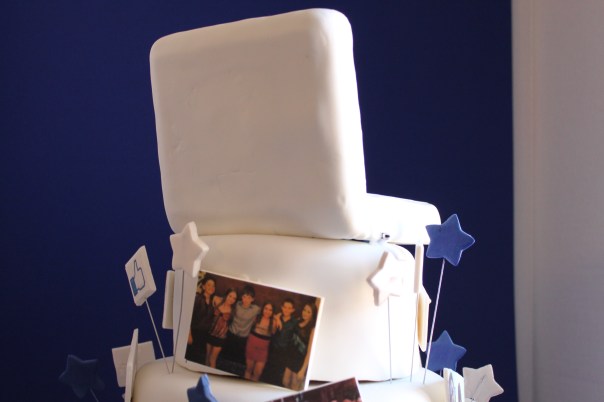
Here is an edible picture of Hailey the Bat Mitzvah girl with her dad and little bro.  Looking good!  Notice the “like” button?  Super cute!

More Kayebook Pics

On this side of the “Kayebook” logo is a pic of Hailey and her mom.  The rest of the cake is filled with pics of the birthday girl and her friends.

Hailey's Friends

Looking good ladies!

More Friends

Cute!

Like!

Like!!  Okay, here’s how to make these edible images.  I printed the images onto sugar paper using a printer that prints food color.  Then I cut the pictures out with a scissor.  Next, I rolled out some gumpaste, moistened it with water and lightly pressed the sugar image onto the gumpaste.  Using a sharp knife, I cut each picture out and allowed them to dry overnight.  I used the same technique for the “like” buttons except that I attached those to wire.

Now onto the best part…the cake topper!

Macbook Cake Topper

This is Hailey’s actual Bat Mitzvah party invitation that I attached to a “Macbook Laptop” I made out of styrofoam.  I used styrofoam so I could create an extreme element.  My husband was actually in charge of this part-he’s technical like that.  This feature took the cake over the top…

Back of the Laptop

What’s that?  Can’t see it?  Oh, let me turn it on…

All lit up!

Cool, cool, cool.  It looks even better in the dark.

macbook logo

My husband installed a white LED inside the stoyrofoam before I covered it in fondant.  He even installed a tiny power switch on the side so it can be turned on and off.  Can you see it?  Now let’s see how it looks in pitch black.

apple logo

It came out great!  It was a huge hit at the party.  Here’s Hailey with all her friends (and the cake)

Friends

Make a wish…

Blowing out the Candles

HAPPY BIRTHDAY!