When my cousin, Hailey, asked me to make her Bat Mitzvah cake, I was excited. When I heard her party theme was Facebook, I was thrilled!! I love themes!!! Her theme was actually “Kayebook” a take on her last name: Kaye.

This cake was so much fun to make. For the bottom tier, I used four 6″ cakes instead of one large layer. I like the look this gave the cake. After covering each of the four 6″ cakes in fondant, I striped each cake in blue painters tape. Then I painted clear gel paste onto the fondant. Each cake was covered in crystal sugar but it only stuck to the gel. When the painters tape was removed, it left this great white on white sparkly design.
Here is a closeup of the “Kayebook” tier. I think I did a pretty good job matching the color scheme of Facebook.

This tier is a 10″ round cake and about 4″ tall. After covering it in white fondant, I used my trusty airbrush to achieve the perfect Facebook blue. I mixed blue with a touch of purple to get this rich blue tone. The key to airbrushing fondant a dark color is to airbrush in coats. Don’t keep airbrushing and airbrushing…trust me, I’ve done it. The color is just too wet and starts to run off the fondant. Just apply a thin coat and allow it to dry to the touch. Then repeat until you have a nice even finish.
The lettering is cut out of gumpaste. I printed the letters out on a regular ol’ laser printer and cut them out with some scissors. I then rolled out some white gumpaste and stuck it to a cutting mat with shortening. Then I traced the letters out with a sharp knife-xacto knife to be exact. I used royal icing to “glue” them to the cake. I feel like I am talking too much, want more pics?

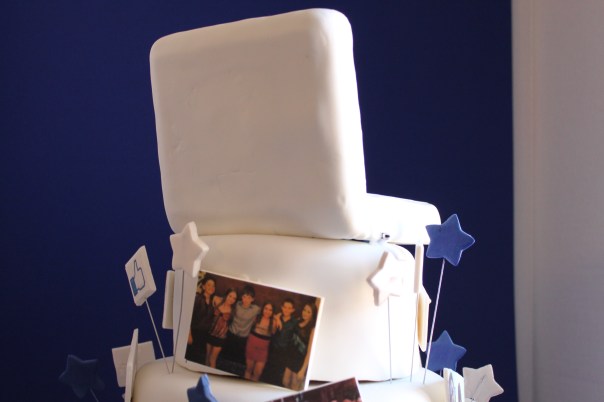
Here is an edible picture of Hailey the Bat Mitzvah girl with her dad and little bro. Looking good! Notice the “like” button? Super cute!

On this side of the “Kayebook” logo is a pic of Hailey and her mom. The rest of the cake is filled with pics of the birthday girl and her friends.

Looking good ladies!

Cute!

Like!! Okay, here’s how to make these edible images. I printed the images onto sugar paper using a printer that prints food color. Then I cut the pictures out with a scissor. Next, I rolled out some gumpaste, moistened it with water and lightly pressed the sugar image onto the gumpaste. Using a sharp knife, I cut each picture out and allowed them to dry overnight. I used the same technique for the “like” buttons except that I attached those to wire.
Now onto the best part…the cake topper!

This is Hailey’s actual Bat Mitzvah party invitation that I attached to a “Macbook Laptop” I made out of styrofoam. I used styrofoam so I could create an extreme element. My husband was actually in charge of this part-he’s technical like that. This feature took the cake over the top…

What’s that? Can’t see it? Oh, let me turn it on…

Cool, cool, cool. It looks even better in the dark.

My husband installed a white LED inside the stoyrofoam before I covered it in fondant. He even installed a tiny power switch on the side so it can be turned on and off. Can you see it? Now let’s see how it looks in pitch black.

It came out great! It was a huge hit at the party. Here’s Hailey with all her friends (and the cake)

Make a wish…

HAPPY BIRTHDAY!

wow so nice and Awesome Cake… i think u r a biggest fan of Facebook…??? Yummy 🙂
and i am gonna add 1 Cake to my collection = Facebook Cakes so will you give me a permission to add 1 cake from your post to my blog: Zurmat.com ….? 🙂
Yes! Add my cake!
How do you charge for this cake? How many did it serve? Beautiful cake!
This was a huge cake, it probably served about 100. This was made a few years ago, I’m not sure what I charged.